This guide will assist you in configuring Microsoft Outlook, either through manual setup using IMAP (or POP3) and SMTP protocols or by utilizing the automatic account configuration tool.
Microsoft Outlook ranks among the leading email service providers. When configured properly, it enables you to manage your entire mailbox efficiently, eliminating the necessity to log into webmail for email access.
Utilizing Outlook for your email is advantageous. You can maintain the use of your custom domain email while enjoying most of Outlook's exceptional features. Additionally, it offers the convenience of accessing your email from any compatible device.
Automatically integrate email into Outlook
Outlook can be configured automatically. In Outlook 2016, the interface appears as follows.
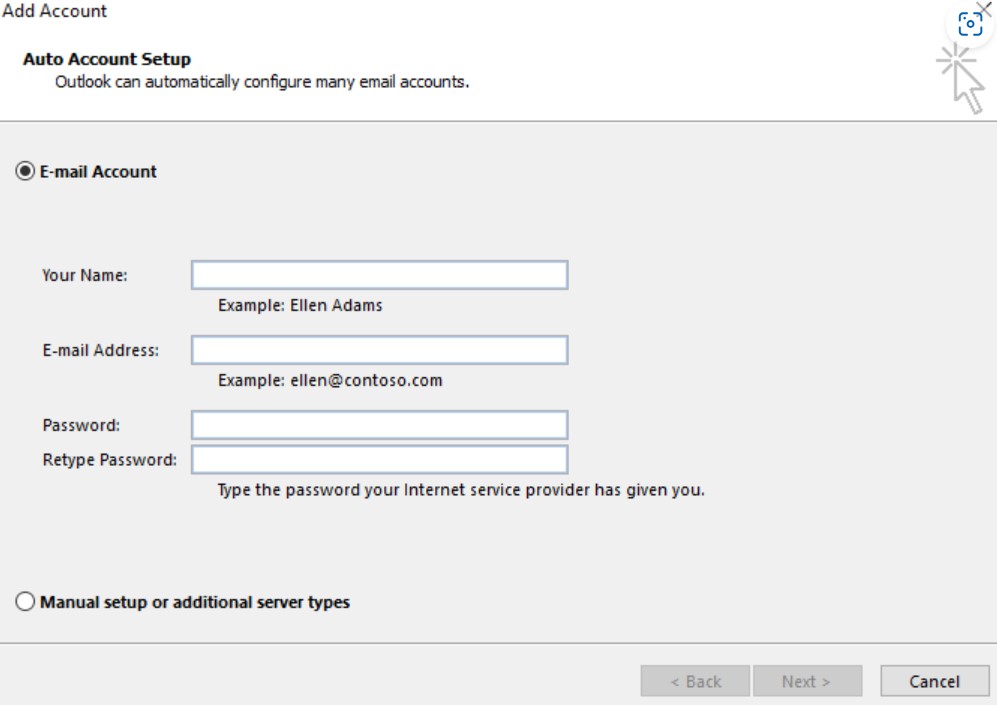
- Begin by inputting your account information and then select the next option.
- The tool will try to configure the email settings automatically. If it fails, please continue with the manual setup process.
- To initiate the manual configuration of Outlook, select either POP or IMAP in the subsequent prompt.
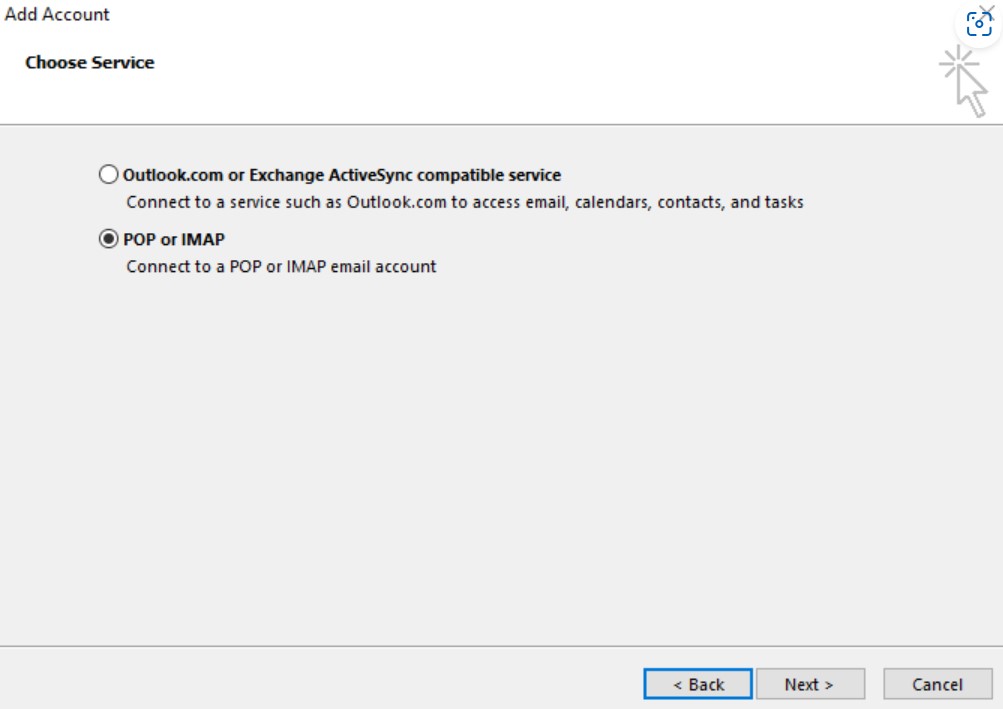
4. After selecting either POP3 or IMAP, proceed by clicking the next button. You will then encounter the following sections: User Information, Server Information, and Logon Information.
5. In the User Information section, please provide your name and email address. The name you enter will be visible to recipients, so you may customize it as desired. For the email address, input the address you are adding, for instance – yourname@yourdomain.uk.
6.Once you have filled out the User Information section, choose the account type, which will be either IMAP or POP3, and refer to the configuration settings outlined below.
Server Information
Account Type: IMAP/POP3
Incoming Mail Server (NON-SSL): yourdomain.tld
Incoming Mail Server (SSL): yourdomain.tld
Outgoing Mail Server (SMTP): yourdomain.tld
Login Credentials
Username: yourname@yourdomain.tld
Password: your password
Final Verification
- Having completed the initial configuration, you must review and adjust additional advanced settings by selecting More Settings.
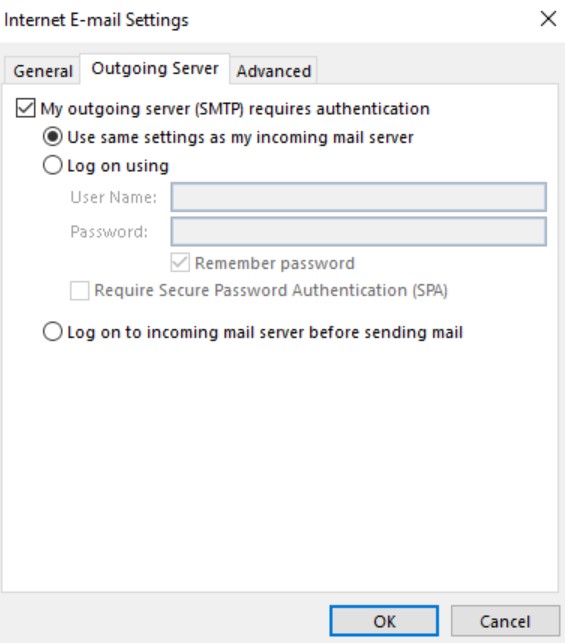
- Next, navigate to the Outgoing Server tab and ensure that the checkbox for “My outgoing server (SMTP) requires authentication” is selected.
- Subsequently, check the same settings checkbox to expedite the process of re-entering identical values.
Click on Advanced, from here check the port numbers.
| Protocol | Non-SSL Port | SSL Port |
| IMAP | 143 | 993 |
| POP3 | 110 | 995 |
| SMTP | 25 | 465 |
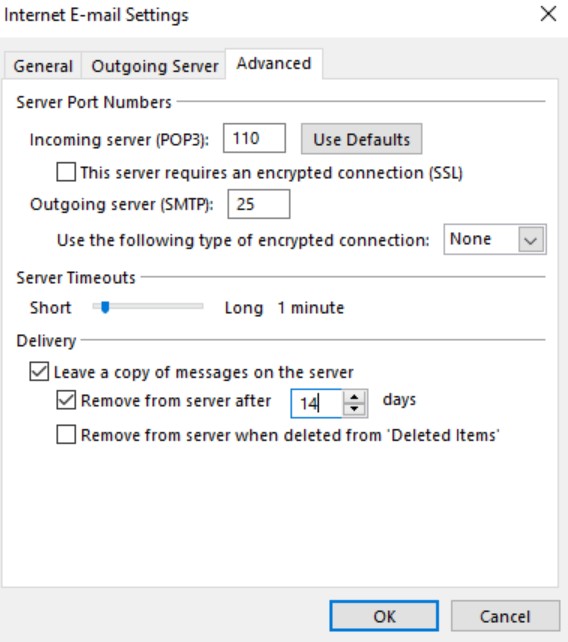
- After reviewing these settings, please select OK.
- Lastly, click Next to access the testing tool.


